
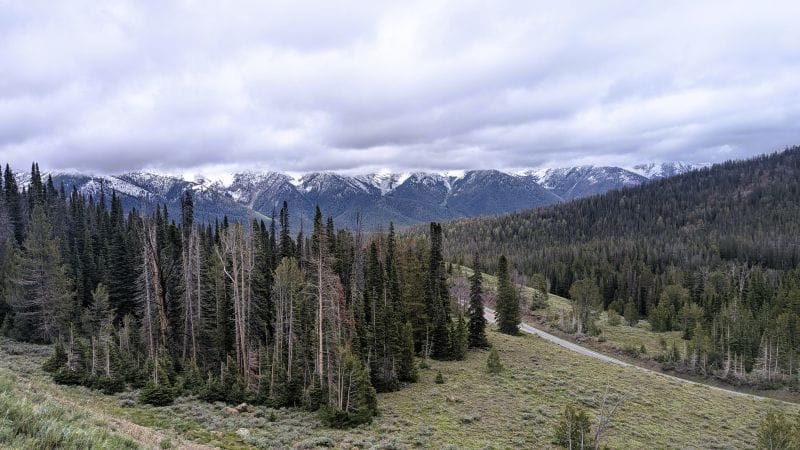
Summer starts on June 21; a week after that, our second winter started for us on June 26. We had a cold trip this spring, but as soon as we got to Boise, it got hot. We had one week with temperatures in the high nineties. I was looking forward to leaving. The day we left Boise, the summer heat wave broke when a cold front headed in from the north. We were ahead of the storm when we left Boise. It was much cooler than it had been all week. The forecast at the place we were going was snow. When winter started at the end of June, we went from being baked to freezing in one day.
One week in Boise, heading for the wilderness
Boise was hot, and we wanted out; the heat ended the day we left town when winter started. The day we departed Boise, they had a cold front with record-breaking thunderstorms and flooding. We departed four hours before the storm hit, headed north of Ketchum. We were scheduled to be at our campsite with no sun for the next five days in the rain (and mud). What fun. While not as high as the high country in Colorado, we were high enough when winter started that snow was a real possibility.
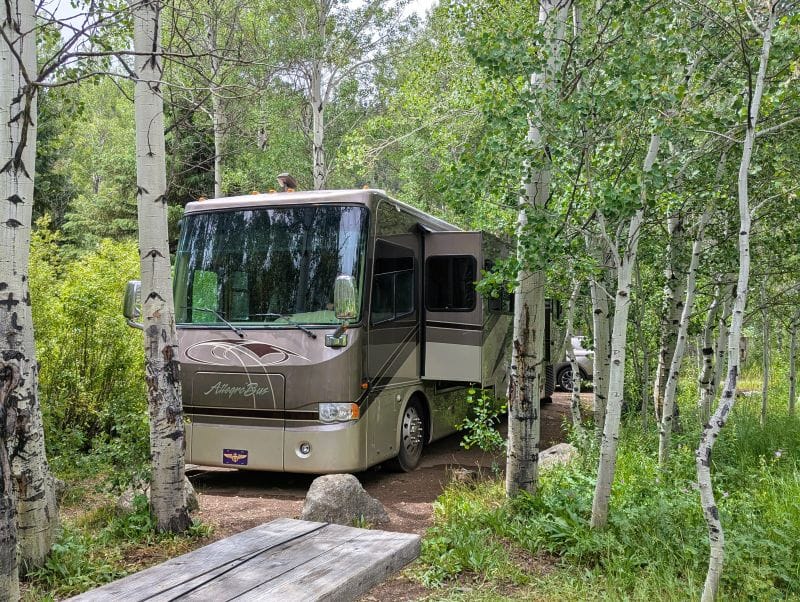
Most of the drive to Ketchum is on the highway until you turn to intercept Highway 75. I am a little vague because there are several routes you could take; we took the road that went through Gooding and Shoshone. The mountains start a little way south of Ketchum, and then you get to drive your big RV through the center of town in Ketchum. Of course, driving through Ketchum was easy compared to being lost in Vancouver, Canada (we did that a few years ago). Here is a link to that story. Lost in Vancouver
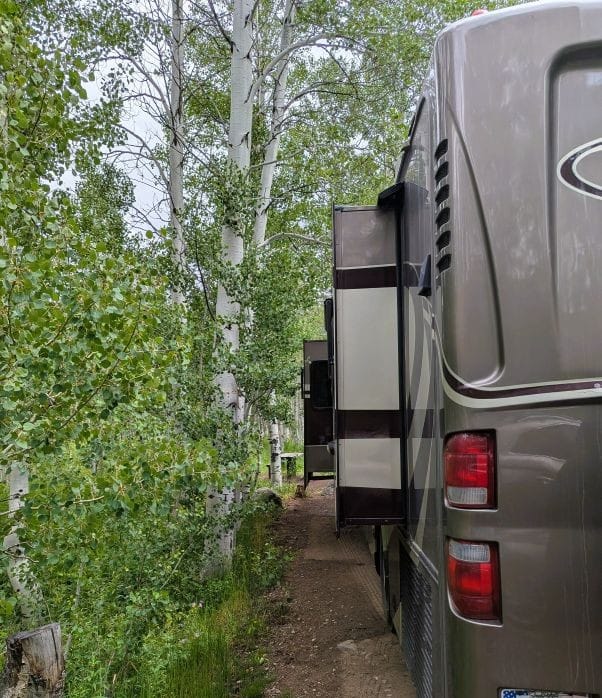
Our first campground was a few miles north of Ketchum, still on Highway 75. The campground was disappointing but far better than the RV parks in Ketchum. We were just inside the Sawtooth National Recreation Area at our prepaid campsite, after a long drive, when winter started. I am glad winter started a little after our arrival and gave me time to set up beforehand.
North Fork Campground
We arrived at the North Fork Campground before winter started. It is about seven miles north of Ketchum and is just south of the Sawtooth Recreation Visitors Center. I picked the campsite six months before without knowing we would be there when winter started, because I figured it would have enough sunshine to keep the batteries happy and because it was the largest site in the campground. Well, when winter started, only a few hours later, all the sunshine was gone for the next five days. Tami was worried that we might have plenty of snow.
The part about our campsite being the largest campsite in the campground wasn’t true. We had bushes on all sides of the campsite, with one side touching the bushes before we opened the slide-outs. Aspen trees were growing into the campsite on the other side. The Forest Service had neglected to cut back the bushes both on the road and in the campsite for several years. As we pulled into the site, I knew I would have to do some trimming just to get enough maneuvering room to get the RV into the middle of the spot. At least I could cut back the bushes before winter started.
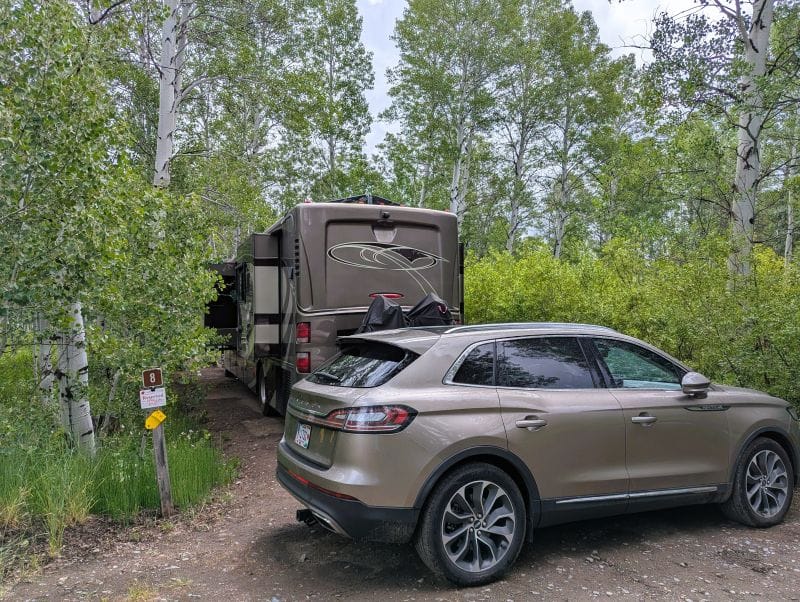
The best thing about these bushes at our campground is that they were really soft, so as we pulled in, unlike the bushes, say, in Arizona, they didn’t damage the sides of our RV. Tami waited patiently in the RV. She likes remote camping but isn’t thrilled about the process of getting comfortable when I cut back the forest. One branch after the next, I cut back the growth to the edge of the spot. Next time we are in the area, I now know enough that I won’t be camping at the North Fork Campground. We won’t need to.
Picking a boondocking site
The primary reason to camp at the North Fork campground for a few days was to scout the area and find a great place to park the RV for the next week, perhaps even two weeks. I knew if I had a few days at North Fork campground while waiting for the weather to improve, I wouldn’t have to worry, even if winter started and we were snowed in. Even though we weren’t snowed in after winter started, we still had to find a place for our next seven days of boondocking.
I heard about great boondocking sites in the area, but I needed to check them out to find our perfect spot. I don’t like scouting for a boondocking site at the end of a long drive. Parking with a reservation is way better than arriving without a plan. I guess I picked up this habit when flying. I never once took off without knowing where I would land. Same for RVing.
Winter started that night
In Boise, after a week of high temperatures, winter started four hours after we left. The cold front pushed through, bringing rain, hail, and flooding. People were paddling kayaks down the streets flooded with water and hail. We drove through that same area that morning when we departed. It was overcast but dry as we departed. Boise got hit hard when winter started on June 26. At our campsite, well before dinner, we were all set up, but we were expecting to wake up to snow.
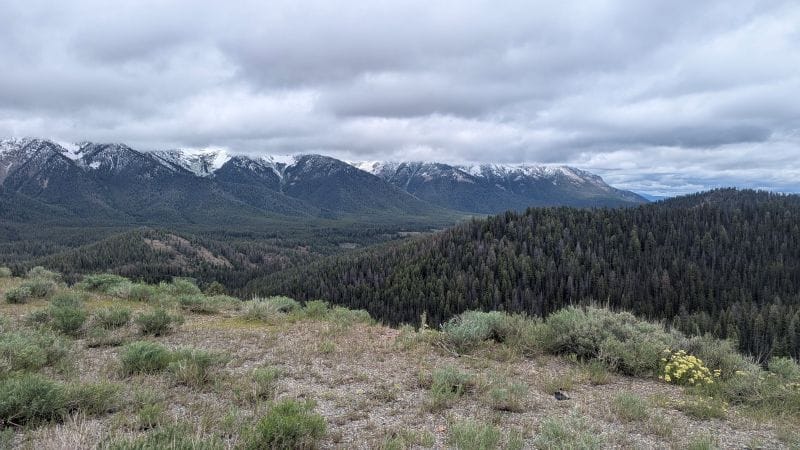
Actually, when winter started, we saw snow on June 27, but it was at a slightly higher elevation. The temperature was in the mid-40s (5 degrees Celsius) at our campground. We turned our heater on. Our rarely used heaters are propane-powered, and we had a freshly filled propane tank. Tami had put our winter blankets on the bed, expecting snow. When we got up, it was cold. Everything was fine, except that we weren’t recharging our batteries that day. I didn’t turn the generator on all day, and it was a mistake. I will let you know why a little bit later in the story.
Gotta have a plan and a backup plan
We always have a plan; it might not be a good plan, so most of the time we have a backup plan. I treat the systems in the RV the same way. We have a large battery bank and now even have a large new battery bank, even larger than before. Pretty soon I will tell you about our battery upgrade. Our plan to recharge our battery is our large solar array. The backup plan for recharging our batteries is our generator. If that doesn’t work, we can go to a place that has electricity and recharge our batteries that way.
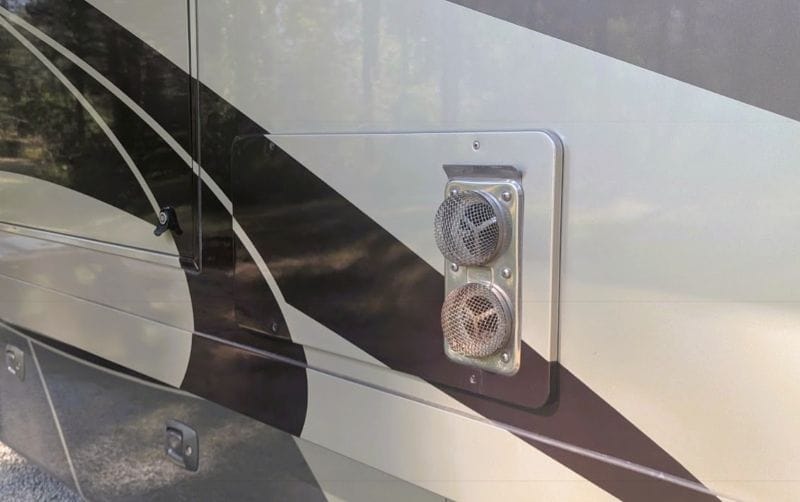
As for our furnace, our first plan is to frequent places that are warm. If that doesn’t keep us warm, we have both electric and propane heaters. If that still doesn’t work, our wheels can take us to a place that is warmer.
First, the furnace screeched
The next morning, at about 10 am, after the RV warmed up on day two after winter started, our furnace screeched to a halt. We couldn’t turn it off fast enough. We had a problem. No more propane heat. As a reminder to myself, I really need to fix the rear furnace (we have two propane furnaces), but it is hard to think about things like that when it is hot outside. I guess you could call my second propane furnace a backup plan for our first furnace. It isn’t a good backup plan if it doesn’t work. We didn’t have a good backup plan after winter started at the end of June.
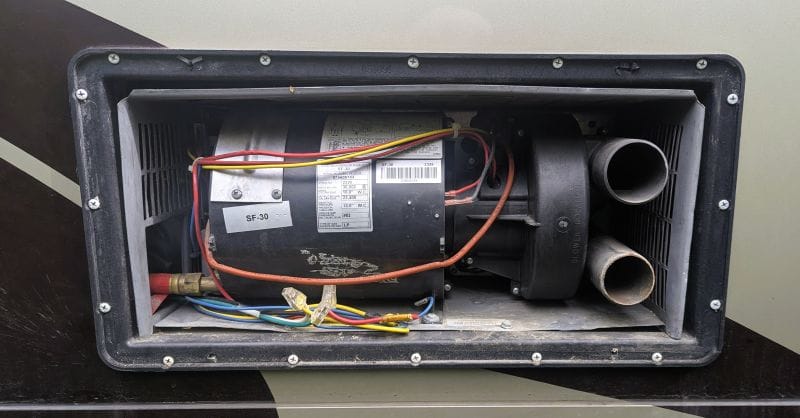
Our RV furnace screeched like that one time before, last year, and I took it apart but didn’t find anything wrong. I had fully expected to find a dead mouse. We don’t frequently use our propane furnaces because we don’t need them, or when we have electric hookups at our campsite, we use the electricity for our heat.
I didn’t find a dead mouse last year. This time, when I investigated, I still didn’t find one, but when I tried to spin the fan, it wouldn’t move. I did this quick investigation between rain showers and quickly buttoned it back up, expecting it to get wet but not wanting it wet on the inside of the furnace.
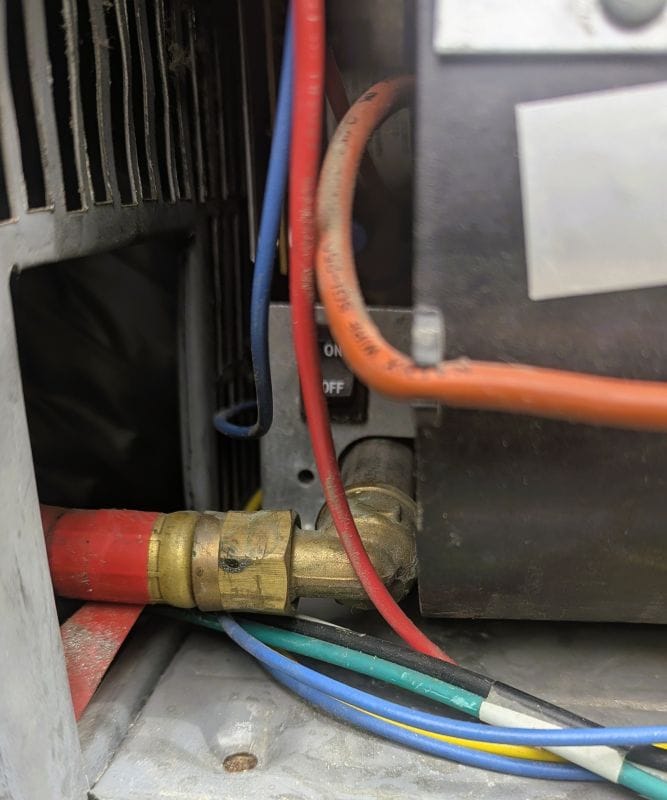
For the next two days, after winter started, the only heat we had was electric from the generator. It made the electricity, and I used the electric heaters. When the rain lightened up a little on the second day, I used the generator for heating. I went out again, in the rain, putting my awning out a little, fully expecting to have to rebuild the furnace with no access to parts. A new motor might have been available after a 150-mile (round trip) drive to Twin Falls, if they had one. Why else would the motor not turn?
It took all day
My heater is much easier to access than some RVs. I have a panel on the outside that, when removed, I can pull out the guts of the furnace after disconnecting the gas line. This time, not disconnecting the gas line wasn’t an option. I needed access to the entire furnace, all the way to the combustion chamber. I am very happy I didn’t need to remove the entire thing but was able to pull it out about 8-10 inches, giving me access to the blowers and motor.
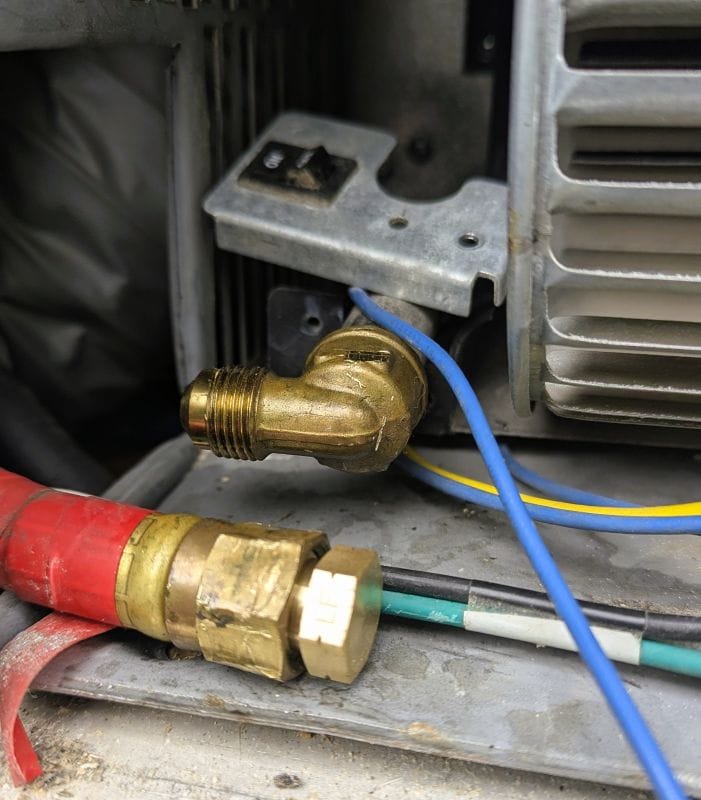
With the furnace partially removed, I first removed the shroud around the fan that blows the heated air into the house, but couldn’t find anything wrong; the motor was still seized. Here I was, at the end of June, without a furnace, when winter started and five days with snow was a real possibility.
The fan wouldn’t move, nor would the motor. So I went after the combustion fan; unlike the blower fan (metal), the combustion fan was plastic. The combustion fan is driven by the same motor as the heat fan but instead forces air into and through the combustion chamber, then out the exhaust. Removing the shroud from around the combustion fan was more difficult, but after removing all the screws and prying it, it came out too.
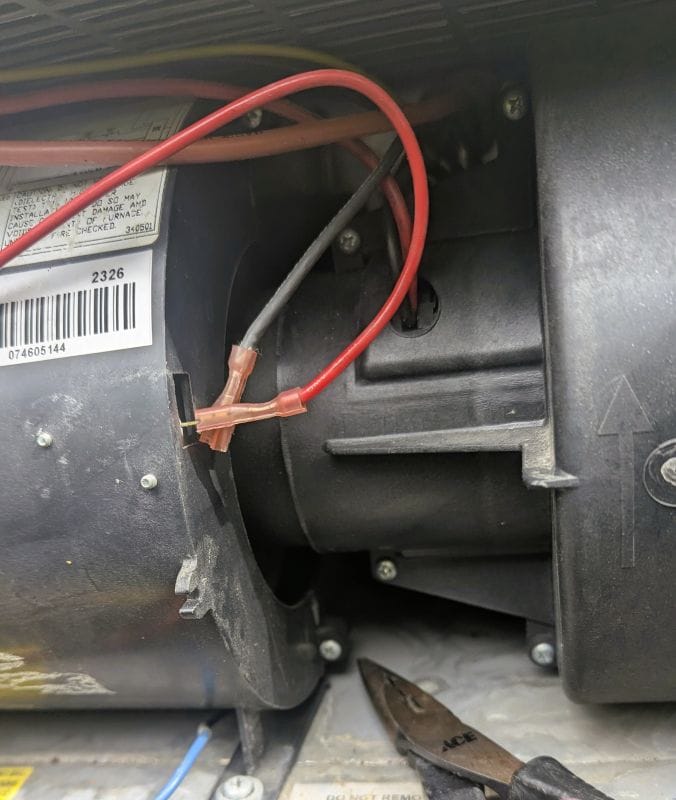
Once I got past the removable part of the shroud, I found the problem: the combustion fan was right up against the shroud’s interior. All the prying to get the shroud off was because this same fan was against the inside of the shroud. I knew it should have been about a quarter of an inch away from the shroud. This plastic fan somehow came loose from the shaft where it had been for almost 19 years and wandered to a place where it shouldn’t be. While it was screeching, before I could turn it off, the fan had welded itself to the inside of the shroud, both to the inner shroud and the shroud I removed.
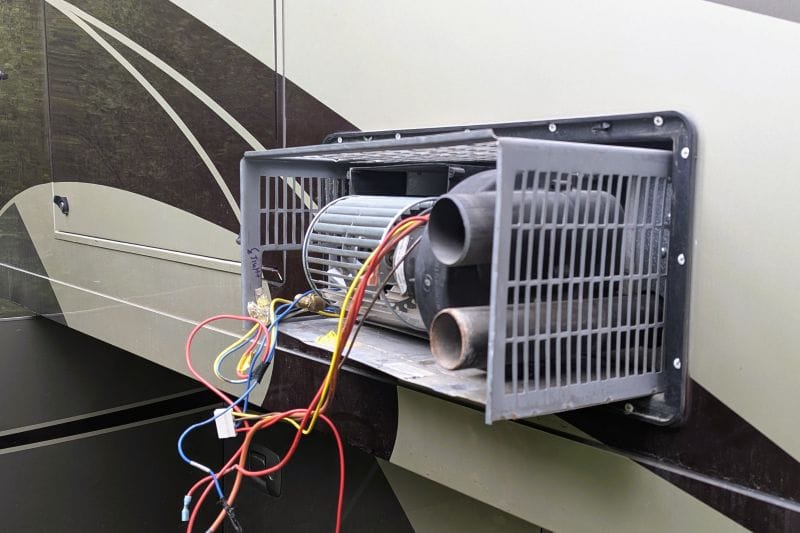
Could I free the stuck fan without destroying it?
While I was hiding from the rain under our awning and our only previously working furnace was sticking out of the RV, it took me half a day to find the problem. The plastic fan spinning against the plastic shroud was welded firmly, just as if the two parts had been hot-glued.
The question was how I would fix it without destroying the fan or the shroud. I had hope because the shroud I had just removed was also welded to the fan; I got it off. My research told me this fan was flexible. This was not the case at all. I still didn’t know how to fix it or what caused it; I only knew that it was stuck.
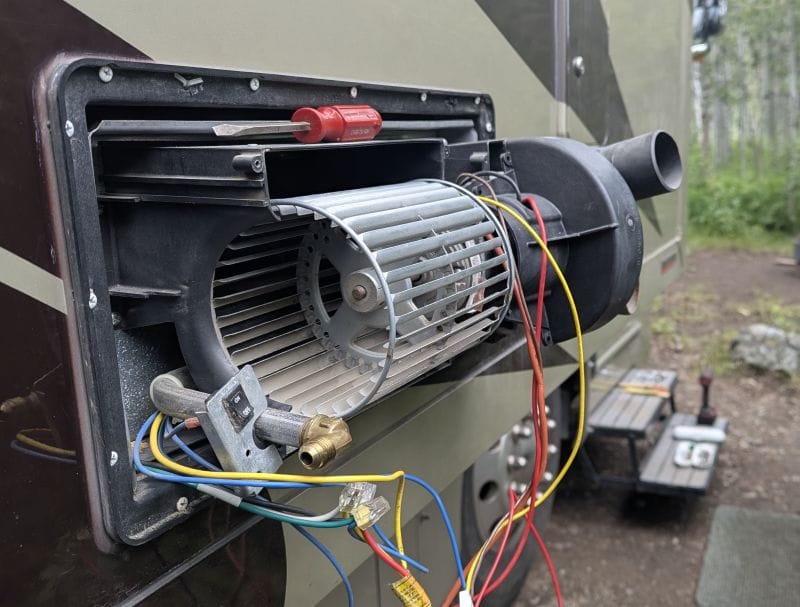
I actually felt pretty good, since I turned it off quickly; perhaps the motor would probably still work. I figured I would still have to make the long drive, but instead I would be trying to get a fan and a shroud. I still didn’t know what to purchase for the repair. I was probing inside the shroud and found nothing special or any idea how to fix it, so I turned my attention to removing the motor.
To remove the motor, you first need to remove the combustion fan, which was welded to the inside of the shroud. I was baffled during the investigation. I discovered that a single screw held the fan in place. It worked great for eighteen years. Because the fan was stuck, I couldn’t even see the head of this screw.
No hammers were involved yet.
One of my mentors once said, “If your only tool is a hammer, then all your problems look like nails”. I always carry a vast array of tools and was determined to find a way to free my fan without using my (multiple) hammers.
By that time, I was convinced I would need a new fan, so I started using a plastic pry bar to wedge between the fan and the shroud, and after a while, it popped free of the weld. The fan and motor rotated, even though they were still against the shroud, so I could rotate it enough to see the screw head. It was an Allen-head screw, so I needed a really long Allen wrench to reach from between the fan blades to the screw head, and nothing I had would fit.
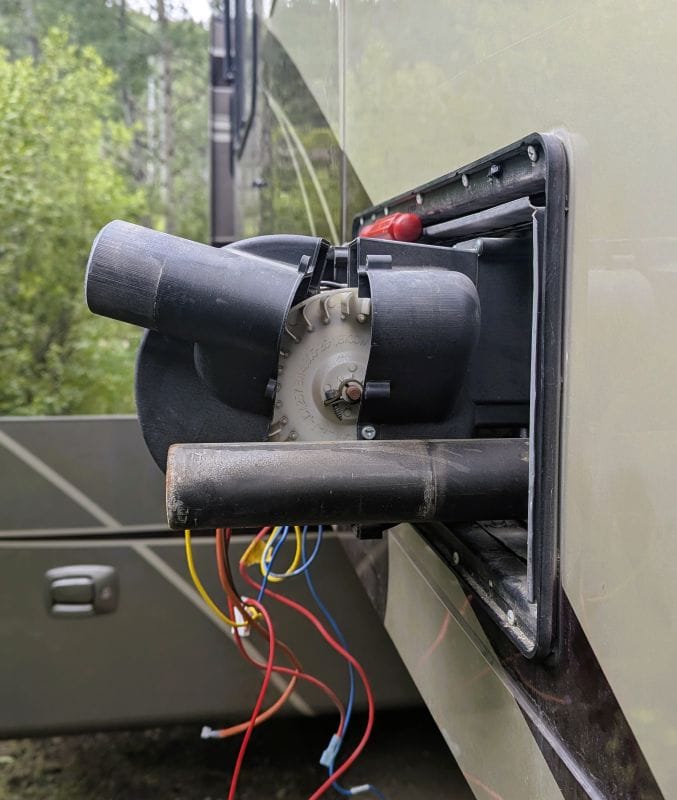
Just about the time I was willing to either destroy the fan or cut a slot in the screw head, I tried one last time, and using a pair of long-nose vice grips, I could grab the screw and rotate it. After it turned only a few degrees, it was loose enough to remove by hand. I still couldn’t get the fan out of the shroud, but I could move it far enough away to tell the motor wasn’t damaged. For some reason, Dometic (the builder of the furnace) put a special screw in the side of the shroud that I eventually removed so I could get the fan off the shaft.
Now that I think about it, if there was a spacer between the motor and the fan that would rotate with the fan, then it could have never touched the inside of the shroud, even if the Allen head screw had somehow loosened. Since I don’t have the furnace disassembled right now, I’m not sure a spacer would work, but the next time I take it apart, I will check and see if that idea would fix it forever.
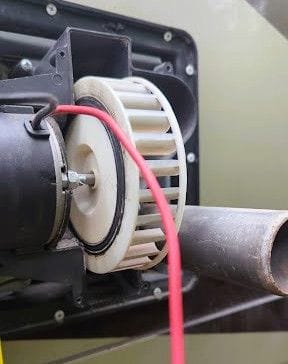
Anyway, with the furnace still disassembled and sticking halfway out of the RV and not connected to the propane line, I told Tami to turn it on to check the motor. I wanted to know if the motor was still good just in case I needed to find a new motor. It worked fine. Before I put the furnace back into the correct place in the RV, connected the gas line, or replaced all the parts, I knew I would have a functioning furnace. After reassembly and connecting it to the gas line. It worked, all better, quieter than it was before the failure.
I was very happy to have a functioning furnace. Good thing, because it was still cold; of course, I told you we were almost the fourth of July when winter started.
Three days after winter started, our generator failed.
The generator was our only heat source after the furnace screeched to a halt. Then the day after I got the furnace to work, the generator wouldn’t start. We had heat, rain, and no way to recharge our batteries; it could happen to anyone. Remember, before I told you that not running the generator on that first day of rain after winter started was a mistake. Now it wouldn’t work, and my battery charge was running low.
Please subscribe and join us on our journey
We will add you to our email list and send you updates once a week. Here is a link. Subscribe
About our links
As you know, our blog income is zero – this allows us to be independent and just tell the truth. We do not get income or commissions. No, we don’t make paid endorsements. We don’t make recommendations, but instead, we will tell you what we like (or dislike). The links are only provided as a quick reference to help our readers.
Links
Hi Valley RV Park, Eagle, Idaho
North Fork Campground, Sawtooth Recreation Area
About Comments
We love seeing your comments, but they are not automatic. I get about 20 spam comments every day, so I don’t allow automatic comments. I read and personally publish every comment to protect the blog and keep it on topic and real. This means you won’t see your comment right after you hit submit. Sorry for the delay in publishing your comments. Please know that we love hearing from you.
Wow, that was quite the deal. Good job and thanks for sharing. Hope things get better.
I’m really impressed with the investigation process that you used to repair the furnace. This is the first time I’ve read your blog. I am just starting out on my own adventures, hoping to find boondocking places to use while traveling. I’m looking forward to reading your blogs if they have the type of adventures such as this one. Don’t get me wrong, I don’t want you breaking down, but please do tell all. Adventures are what really feed the hart and sole of the wanderers. Adventure on and be safe.
When you have a house that is constantly going through an earthquake every time you move, it tends to create new projects to fix, indeed. Good job figuring it out and fixing it!
Always enjoy hearing about your travels & “adventures “. Even the bad ones. I’m sure you’re helping lots of people understand some of the RV problems. Thanks.
Pingback: Awesome Boondocking Adventure in the Sawtooths - FoxRVTravel
Pingback: Boondocking with our new batteries after our generator died. - FoxRVTravel
Pingback: Then our generator failed. - FoxRVTravel