
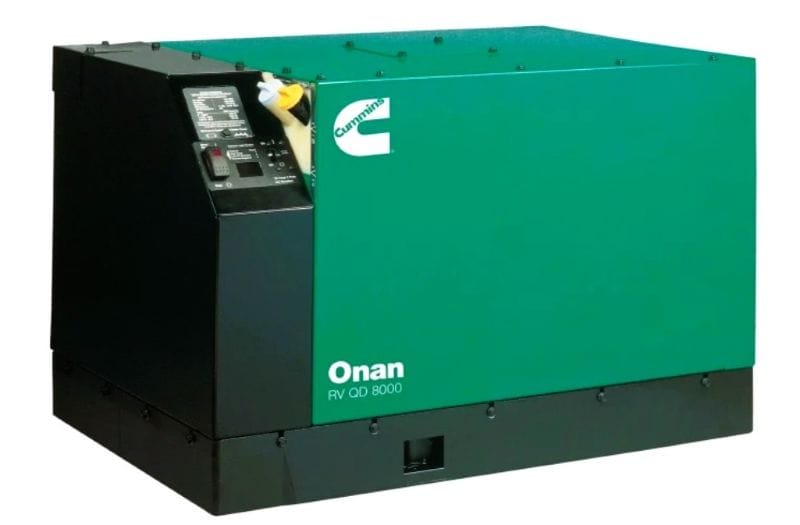
As soon as we got to our boondocking site, our generator failed. So when we departed the Sawtooth Mountains, our goal was to get our generator fixed. To do that, we skipped our scheduled campground in Challis and a week of boondocking near Stanley. I hoped we could fix it in the next town (Salmon, Idaho) along our desired route. Of course, I started making phone calls while we were more than 170 miles south of Salmon, lining up help and ordering parts.
About this post
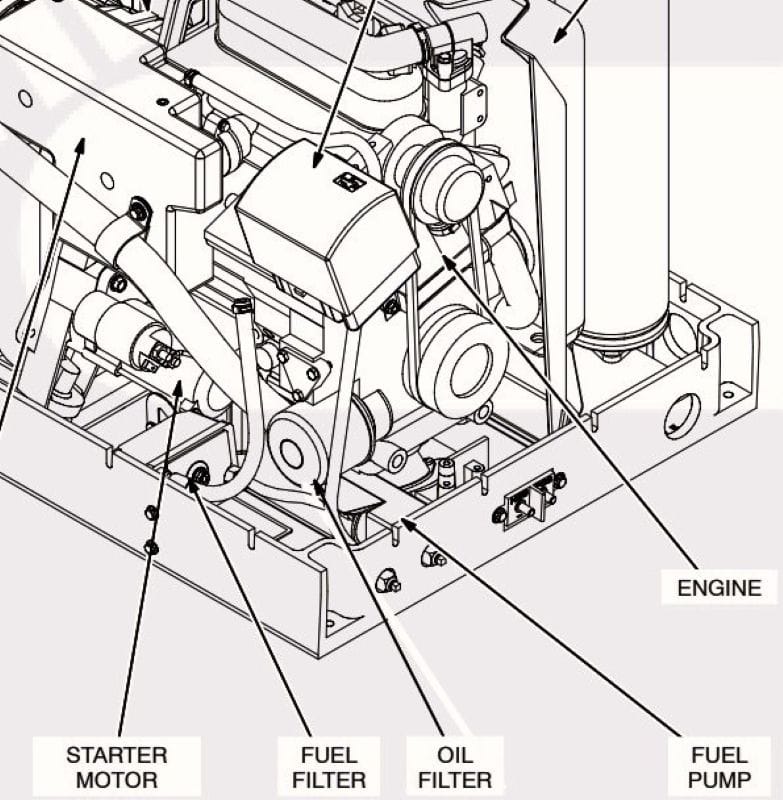
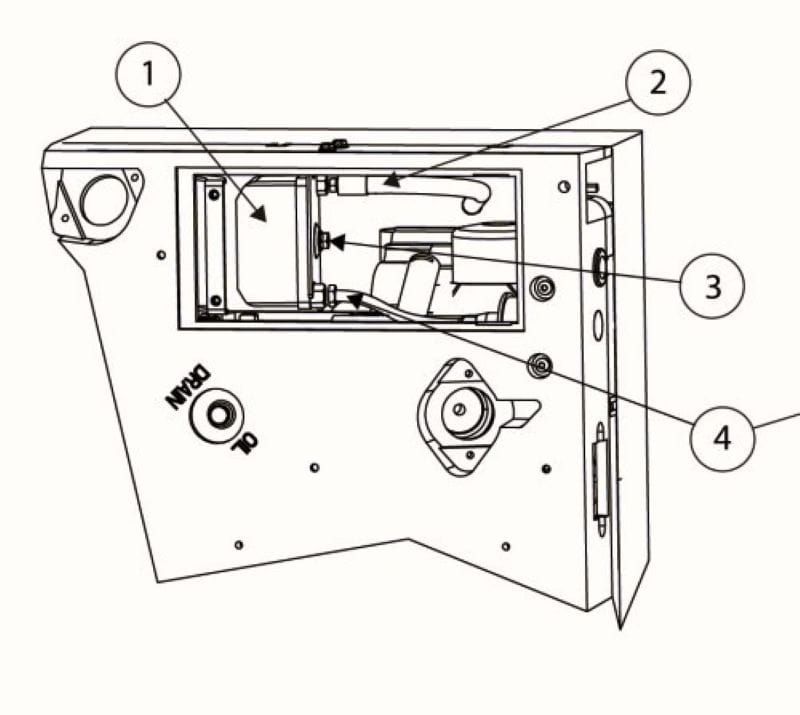
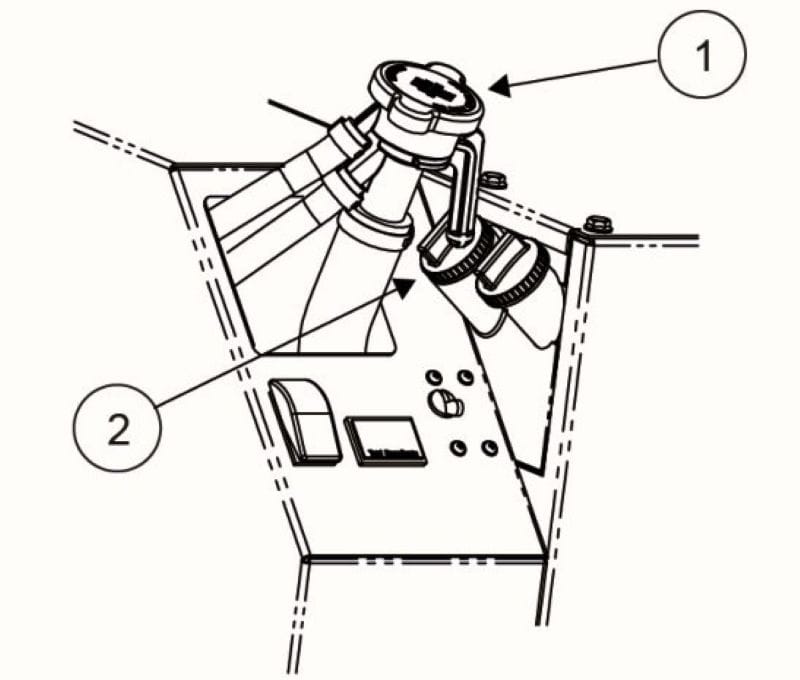
Sometimes (frequently) I use my blog as a memory aid. So, in this article, some of the photos are more for me than you and include information so I can remember what we did and what parts we used. Some photos were included in other articles but also apply to this one, and I included them to help this article stand alone. Line drawings are owned by Onan and used with permission. They only cared if I made money on the blog. Since I am only trying to be helpful, they are fine with it.
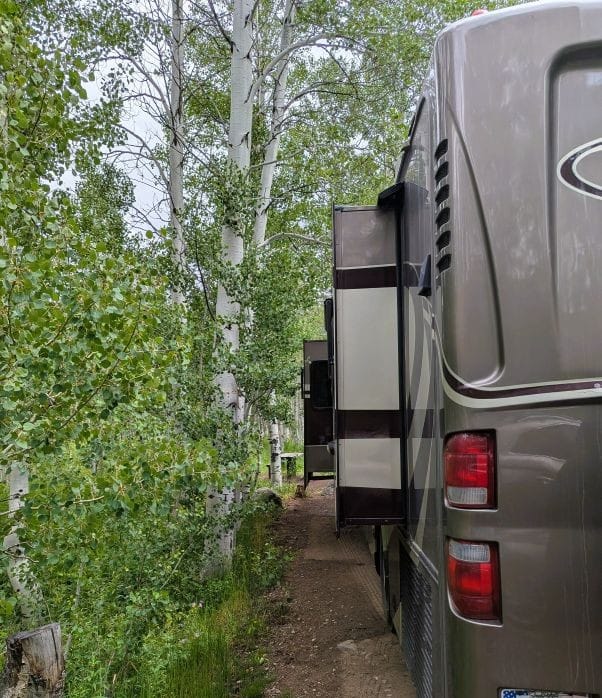
Our generator was our only source of heat
When our furnace failed, our generator was our only heat source. Not having a generator was more than an inconvenience to our travel plans. We needed our generator as a backup electric source to our solar to recharge our batteries. Our stay in the Sawtooth Mountains started with a short stay in a Forest Service Campground a few miles north of Ketchum when winter started at the end of June.
At the Forest Service campground, we used our generator to stay warm while I repaired the furnace. Yes, right before our generator failed, our furnace failed. I am very happy I got the furnace fixed before the generator failed. Here is a link to the story. Winter started at the end of June
Boondocking with a broken generator
The purpose of our stay at the North Fork Campground, located just south of the Sawtooth National Recreation Area Visitor Center, was to find a boondocking spot near Ketchum (Sun Valley Ski Resort area) where we could spend at least a week before traveling further north toward Stanley. I didn’t anticipate the cold weather, the rain, the failed furnace, or especially our generator failure. Still, even without our generator, we boondocked successfully for an entire week without it as our backup electric source.
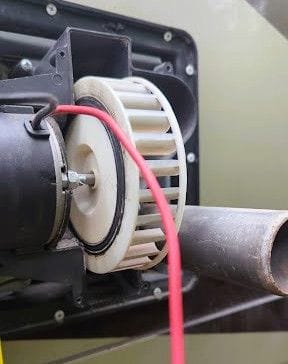
I got lucky on my site selection, and we had just enough sunshine that we didn’t need a backup to our solar electric. Our backup plan was our generator, but it failed on day one of our boondocking stay. Still, we did fine. If you didn’t see the article about living without our generator, here is a link. Awesome Boondocking Adventure in the Sawtooths

While our furnace failed, our generator was our only heat source, and it also charged our batteries while it rained. With our furnace broken, we ran the generator and used small electric heaters to stay warm. After I got the furnace fixed, we still had no sunshine, so we moved to our boondocking site that promised sunshine and solar electricity, saving our generator for a backup. Here is a recap of how we did using only our solar array to charge our batteries without using our generator. Boondocking with our new batteries after our generator died.
Enough sunshine to go a week without a generator
By the time we made it to our boondocking site, the tables had turned. Our generator failed, but I had repaired the furnace. Our only source of electricity for the week was our solar array and batteries. It wasn’t until we drove three miles down a muddy road that I realized we couldn’t start our generator. We had a great spot with partial sun and could almost fully recharge our batteries each day. It wasn’t until after we were already set up that the generator failed to start. I was pretty convinced we needed a new starter, and getting a starter in this part of Idaho was challenging.
At the time, I thought driving in the rain might have caused the generator to fail to start. I knew it wasn’t the mud because the generator sits in front of our front wheels, and they weren’t throwing mud around, or at least I didn’t find any on the generator. After a week of not starting, I knew it wasn’t the rain, and my testing proved that it wasn’t a lack of electricity from our batteries that caused the generator failure. My failure was inside the big green box. The starter wasn’t even attempting to start it.
We really needed to fix the generator.
Our summer travel route depended on our generator nearly all summer. We weren’t going to RV parks, but rather campgrounds that may not have enough solar. For example, right now we are sitting in a campground running our generator because it is raining. We were working our way across the mountains in Idaho and Montana, with plans to visit Glacier National Park and Waterton Park in Canada. In these places, we were going to make our own electricity, with only a few exceptions.
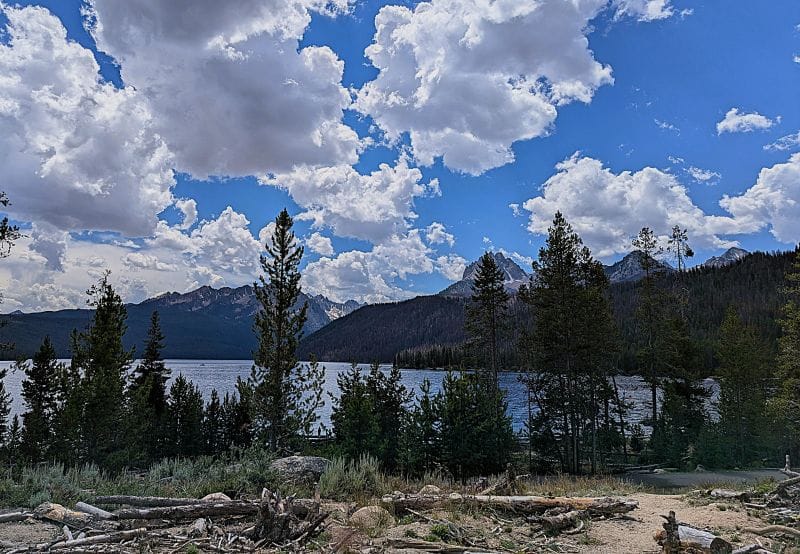
So seven days later, we drove to a campground in Stanley, Idaho, to get electricity and water; our batteries were below 20% state of charge that morning. In Stanley, I learned my inverter/converter could (only)charge (at about 100 amps per hour) for 6 hours. The problem is that I needed about 10 hours to fully charge the batteries. By the time I figured this out, solar wasn’t helping; it was too dark.

That night we went to bed with external power on, which wasn’t charging the batteries. The issue with our inverter will have to be a different story, and it is behaving now. The next day, I hit 100% on the batteries while still hooked to shore power thanks to the solar without any assistance from the inverter. Rebooting the inverter would have reset my six-hour timer, but I didn’t think of that. While staying in Stanley, the generator still wouldn’t start.
Change of plans to get the generator fixed
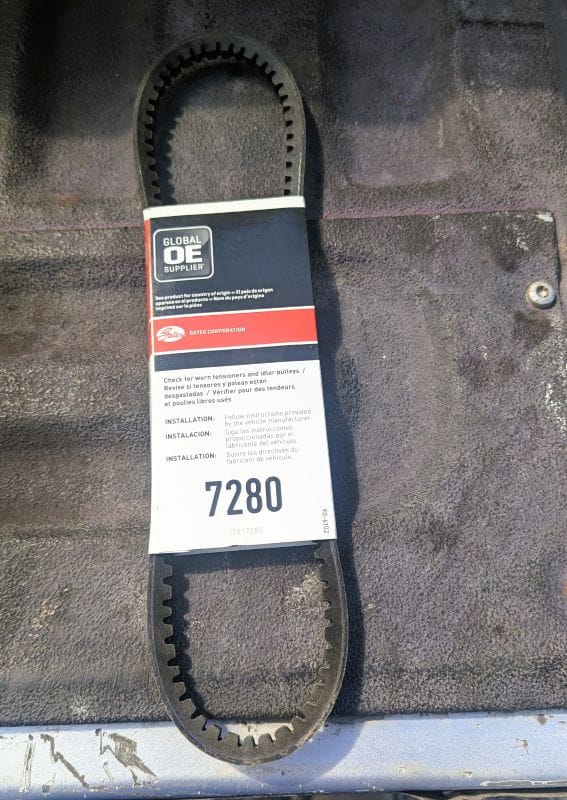
So we drove past Challis, north to the next (bigger) town (Salmon) to get the generator repaired. Stanley is beautiful but way too small to get my generator fixed. We parked in Salmon, Idaho, for the next five days and overhauled our generator but didn’t fix the problem. My attitude was that if I had to tear it apart, I might as well do a complete overhaul of all the wear items. My number-one suspect wear part was a “fan” belt that may have never been replaced. I call it a fan belt, but it’s really the belt that turns the coolant pump.
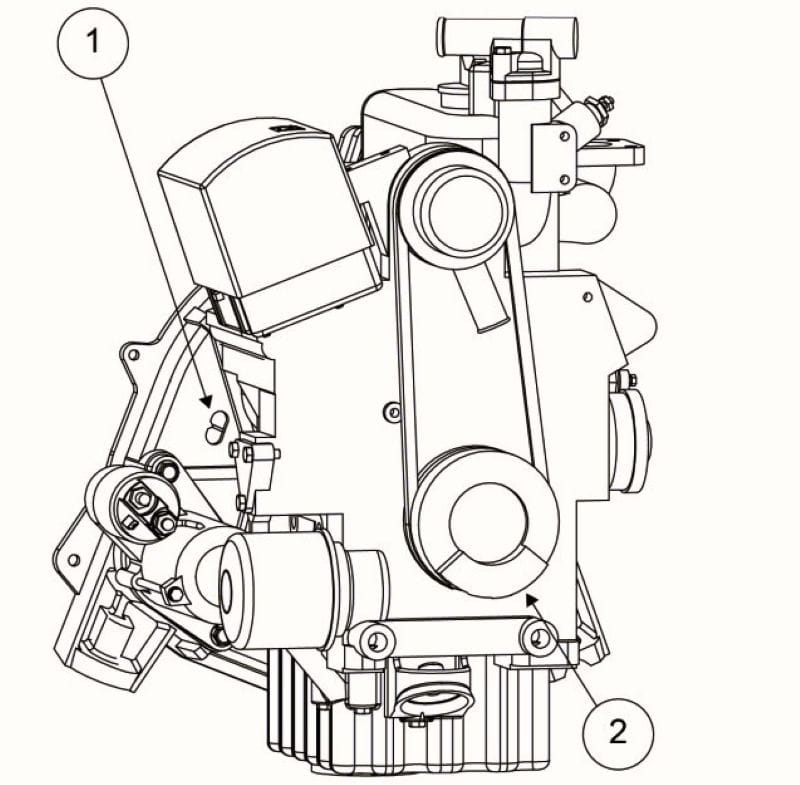
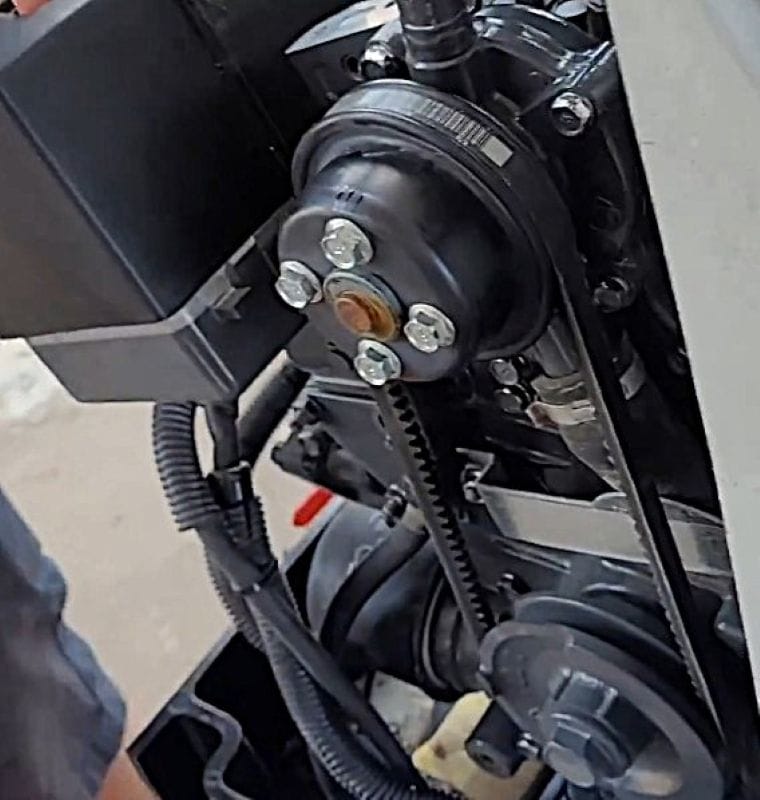
But as always happens in any repair, we hit a major speed bump slowing us down. We didn’t fix the problem because the replacement starter didn’t match the old starter in my generator. This was a huge issue. To save time, I ordered a new starter from Onan, shipped directly from Tacoma. Shipping was estimated at 3-4 days. By ordering it directly from Onan, I hoped I would get the correct starter.
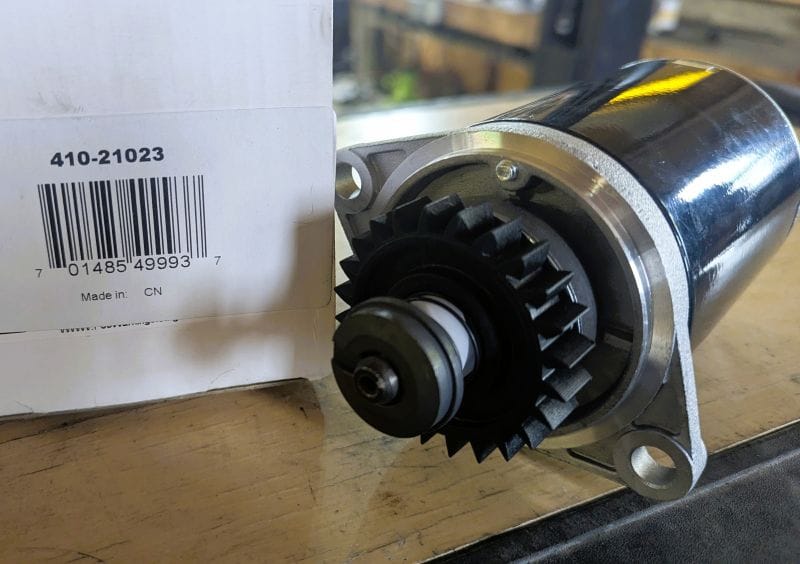
So, instead of fixing he problem, we focused on the fan belt and other maintenance items. As we tore it apart, we found that the fan belt was fine, but we replaced it anyway and saved the old one for a spare. We did this part of the overhaul while our new starter was en route, and we sent the incorrect starter back to Amazon. At least I had enough resources in Salmon to do some service on the generator, including installing a new belt.
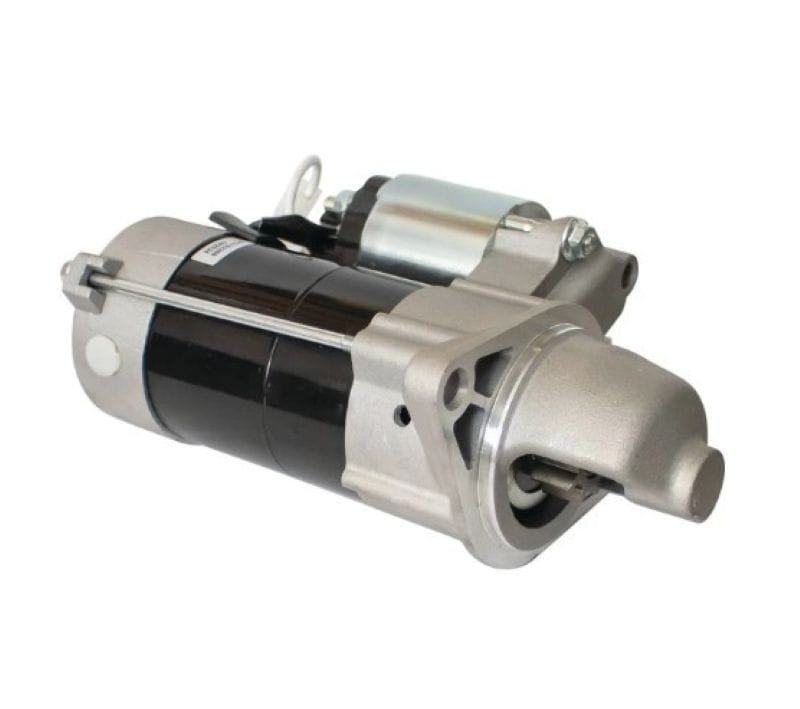
As for the generator and starter, the starter started working when we were in Salmon and started the generator multiple times. Sometimes the starter quits and then starts working again without repair. Sometimes, tapping the starter makes it work. This solution isn’t good, especially when it is raining. The problem is that the starter is inside the big green steel box that houses both the engine and alternator. You can’t see the starter without disassembling the box, which takes hours. To make the generator reliable, replace a partially functioning starter with a fully functioning one.
About my generator
In the front of our RV, we have an Onan Quiet Diesel “QD” 8000 generator. The QD name and 8000 part came from Onan’s marketing department, not its engineering department. And it is not quiet. The 8000 name indicates the number of watts the generator can produce. If I needed to replace this generator with a matching new one, it would cost about $13,000 plus labor. A new one probably wouldn’t be as good as my nearly twenty-year-old generator. The biggest generators in RVs are rated for 12,500 watts, so my generator is a couple of steps down from the biggest generators available.
About your generator
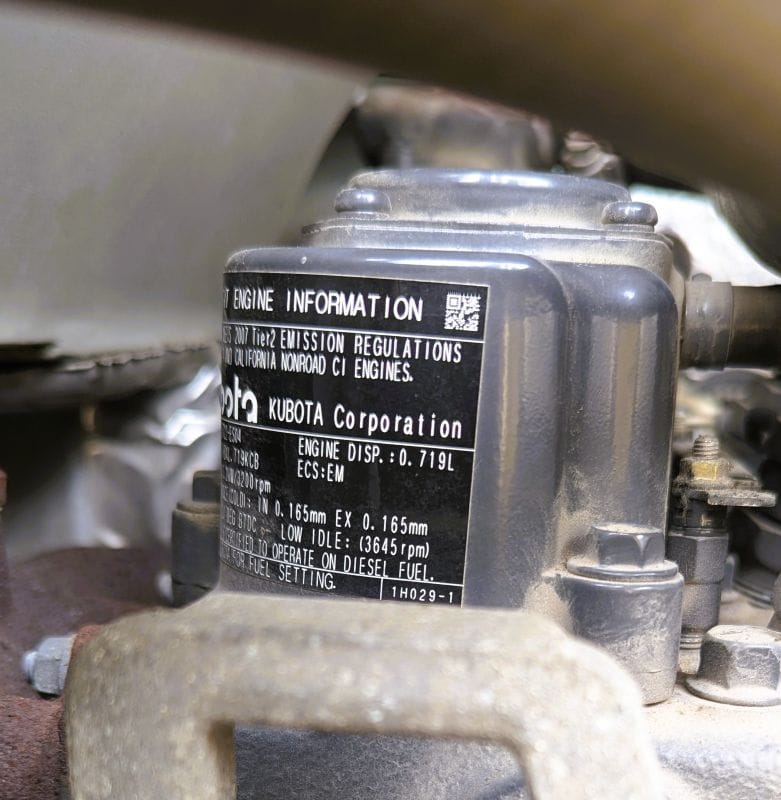
Everything below applies to my generator. The generator name is the starting point. My generator is an Onan QD8000 8HDKAK-1046k “Spec K”. The serial number is J070115682. The extended name (8HDKAK-1046k), including the last letter (K), is very important. Even the first letter of my serial number matters; I have included links to my generator manuals at the bottom.
Specifications as advertised
- Power Output: 8,000 watts (8 kW) at 120V single-phase.
- Capacity: Runs two 15,000 BTU air conditioners at the same time with power to spare.
- Fuel Use: Consumes about 0.49 gallons per hour at half load.
- Size and Weight: Weighs 420 pounds and measures roughly 36.3 inches long
Inside the green steel box
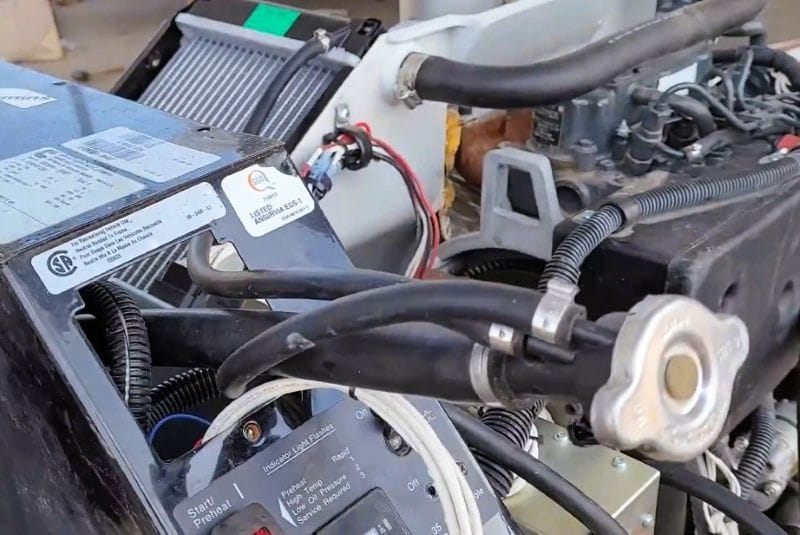
Inside the green box, there are two major components. The first, positioned furthest forward in my RV, is the alternator. This is the part that actually makes the electricity. Just aft of that is a Kubota 3-cylinder, 4-stroke, liquid-cooled 16.6 horsepower diesel engine that provides the rotational power to spin the alternator. When the alternator spins at about 3200 RPM, it can produce 8000 watts. The biggest difference between the 8000-watt model and the 10000-watt model is that the 10000-watt model generator weighs nearly twice as much as my 8000-watt model.
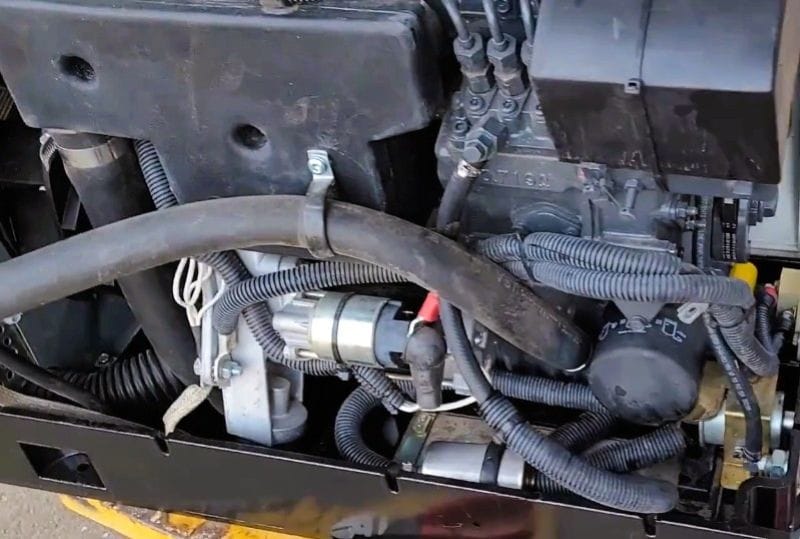
However, my generator’s true limit is the 35-amp circuit breaker. This means that the 8000 watts (alternator rating) can supply a little more than twice the electricity than I can actually use. Put another way, I can really only use 3850 watts (at 110 volts) from the 8000-watt alternator. Using the same math, the 12,500-watt generators are probably limited to about 6000 watts. Generator math is deceptive; someday I will tell you about inverter math, which is even more deceptive. While our new starter was being shipped across Oregon, Idaho, and Montana, we finished all the maintenance, and the only part we needed was the starter to complete the overhaul.
How the generator works
This is the part of the story where you want to know what time it is, and I tell you how to build a watch. I already mentioned the alternator. This contains lots of copper wire and some high-power magnets. The magnets create a magnetic field. If you move the wire through the magnetic field, some of the energy transfers to the wire as electricity. This energy transfer is called electromagnetic induction. The other part of our generator is the diesel engine; it creates the mechanical energy to move the copper wire through the magnetic field.
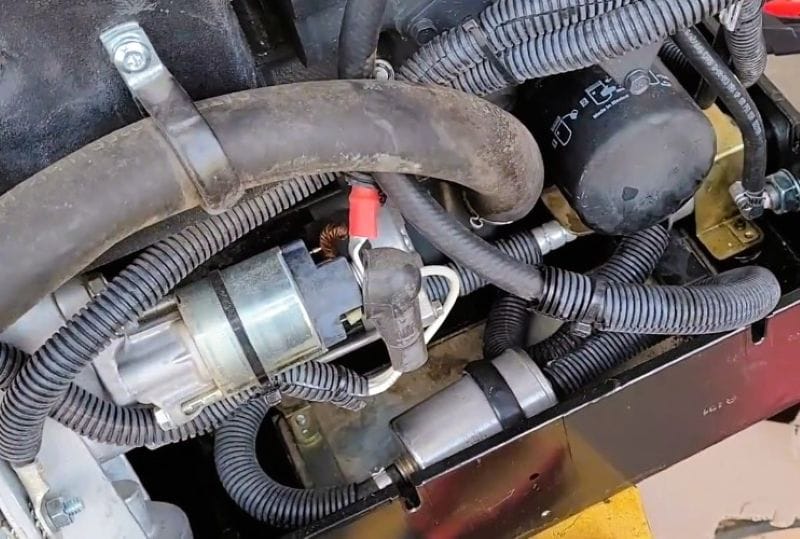
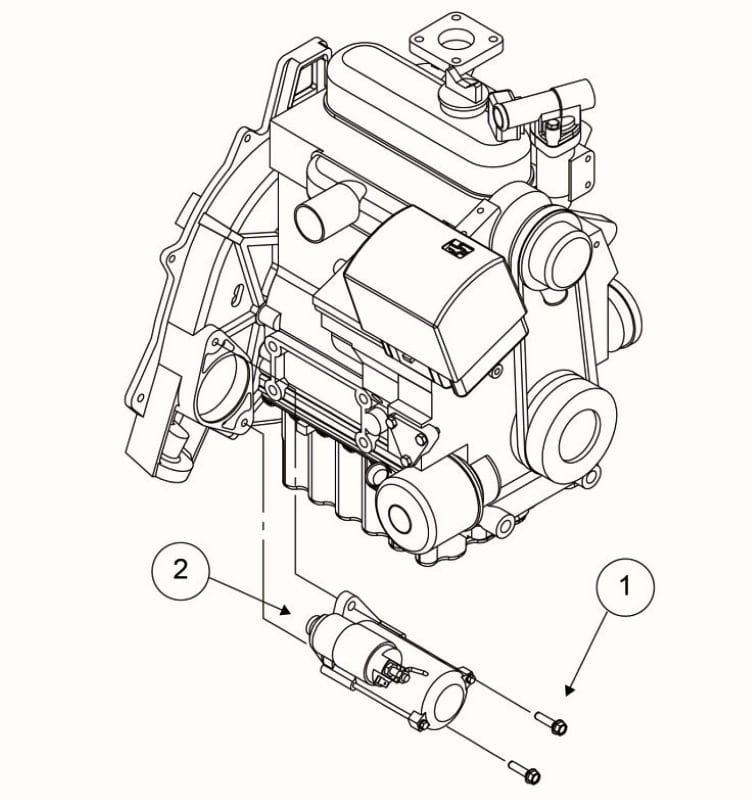
Our problem was that our 16.6-horsepower diesel engine wouldn’t start. Since our RV carries 150 gallons of diesel fuel, it’s a great power source to drive the alternator. The diesel engine is also simpler to operate than a gasoline engine because it doesn’t have spark plugs or other ignition parts. Instead, the diesel engine relies on heat and compression inside the cylinder to ignite the fuel and create motion. Before starting the engine, glow plugs heat the fuel-air mixture in the cylinder to help it ignite.
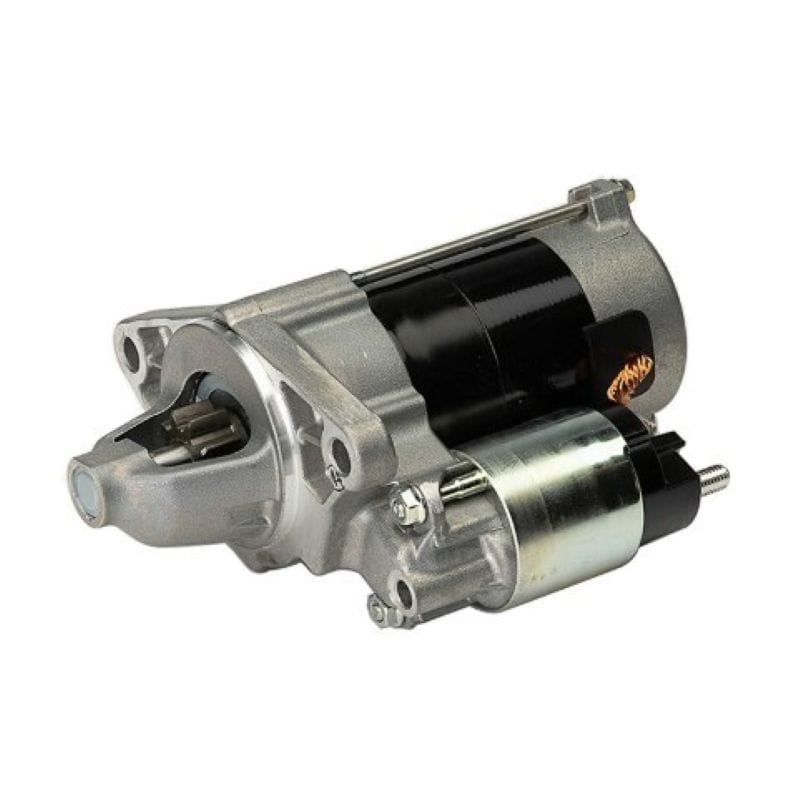
Before reaching the engine, a fuel pump pressurizes the fuel. On my engine, I couldn’t tell if the fuel was clean, but I could hear the fuel pump operating. On my engine, the fuel pump would engage and rattle, then the control unit would send a start command to the starter, and right after that, quit trying before turning over the engine.
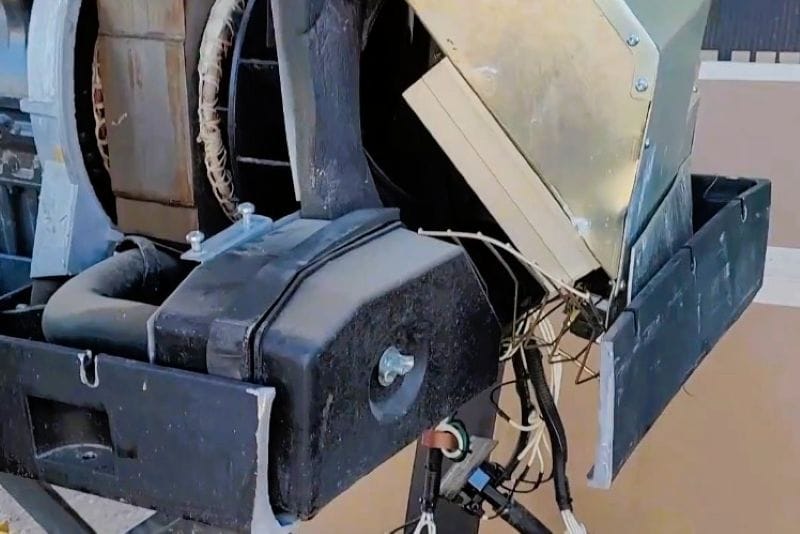
Two things happen at the starter: first, the starter solenoid moves a small gear attached to the starter motor to engage it with the flywheel. After that, current from the battery spins the starter, moving the engine components. If the solenoid doesn’t move the gear into the correct position, then the electric current isn’t applied to the starter motor.
About FedEx shipping
Our starter shipment fell apart while crossing Montana. Salmon is south of Missoula. My new starter stopped in Missoula but didn’t turn south; instead, it kept going east. It stopped in Deer Lodge, Montana, which is about 150 miles east of Salmon, but again didn’t get off the truck and kept going east. I have no idea how FedEx makes money making these mistakes. If it had only gotten off the truck in Missoula, we would have had our starter 4 days earlier. The starter then sat in Billings for the weekend (almost 350 miles overshoot) just to rub in the mistake. It then went back to Missoula before turning south to where we were waiting.
The problem with my generator
I started putting the following troubleshooting guides together while still boondocking. I needed to know everything about the generator and troubleshooting before I took it apart. Since my generator is older, it didn’t need any electronic diagnosis tools to find the problem. Instead, I had to interpret blinking lights. The fault code on my generator’s blinking lights said the failure was because the engine wasn’t spinning fast enough during the start cycle to run properly. No kidding, not spinning at all, isn’t spinning fast enough. So, even though the fault codes didn’t help me, I am including the process in case it helps someone else.
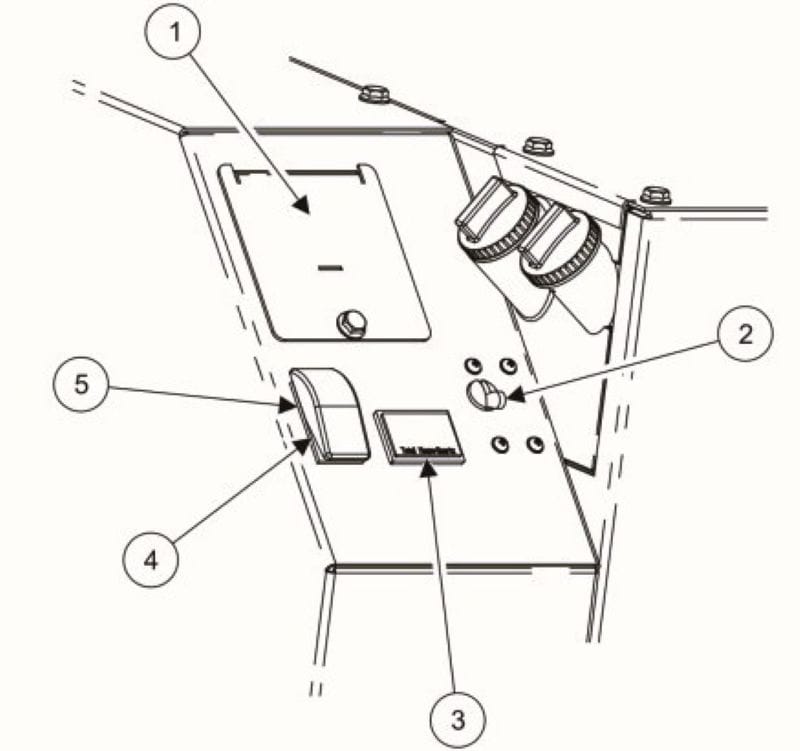
To retrieve fault codes:
- Press the stop/prime button three times. Count the number of flashes (1, 2, 3, or 4). The flashing lights will then display the general fault code.
- After that, press the stop/prime button one more time to read the second-level code. The next set of flashes will be the general fault code (1, 2, 3, or 4). Followed by a pause, and then a second-level code (1-9).
Example: three flashes, pause, then two flashes is fault code 3-2. This pattern will repeat until you press the stop button.
Notes:
- Do not confuse first-level codes with second-level codes (like 33 or 44).
- To stop displaying the fault codes, press the stop/prime button once more.
- If the light stops blinking (usually after 5 minutes), press Stop three times within five seconds to restore the blinking. The last active or corrected fault will display. (1, 2, 3, or 4) Press the stop/prime button one more time to retrieve the secondary code.
General Fault codes (level one codes)
- 1 Blink: High coolant temperature.
- 2 Blinks: Low oil pressure fault.
- 3 Blinks: Service fault.
- 4 Blinks: Overcrank; engine cranking exceeded 30 seconds without starting. When starting an Onan generator, time it to ensure you don’t exceed 30 seconds and give up before you get this fault code.
Note: The last logged fault will display even if you correct the condition that caused the shutdown. Only one fault code can be displayed. A more recent fault code replaces the current fault code.
Fault codes 33 and 34 are not assigned to avoid confusion.
- 1 Blink: A one-blink fault code on a Cummins Onan generator means the control board detected dangerously high engine coolant temperatures (over 230° F or 110° C) and triggered an automatic shutdown to prevent catastrophic engine failure.
- 2 Blinks: Low Oil Pressure Fault indicates the engine shut down because the oil pressure switch failed to open. First, manually check the dipstick and top off the oil if low. If oil levels are normal, the issue is likely a faulty oil pressure switch, a bad wiring harness, or a loose connection
Primary with secondary fault codes
- Code 1-2 Overvoltage
- Code 1-3 Undervoltage
- Code 1-4 Overfrequency
- Code 1-9 Actuator shorted or open
- Code 2-2 Actuator overload
- Code 2-4 Faulty engine temperature sensor
- Code 2-7 VAC sense lost
- Code 2-9 High battery voltage
- Code 3-2 Low cranking speed. This was my fault code.
- Code 3-5 EE checksum fault
- Code 3-6 Generator stop without a fault condition
- Code 3-7 Invalid set configuration
- Code 3-8 Field overload
Note: Onan generators hold the last recorded fault code in memory until a new error overrides it, so the code might still appear when checking diagnostics even after a successful repair.
Troubleshooting Code No. 3-2 – Low Cranking Speed Fault: Cranking speed less than 180 rpm for more than 2 seconds. The crank and generator frequency are less than 3Hz for greater than 2 seconds.
- Test the Battery: Verify chassis battery voltage under load. It should drop to about 11.5-12V while cranking. If it drops lower, the battery is weak or discharged. Check battery voltage at the genset terminal; it should be 11 ± 0.2V or above. Inspect battery connections at the terminals. Check the DC system and cables. Test the battery at the genset terminal on the back of the generator. Testing here confirms the cables to the generator are working. If the voltage at this location is adequate, then the problem is inside the generator box.
- Clean and Tighten Connections: Inspect the positive and negative battery terminals and the grounds on the generator block. Corrosion and loose cables are primary causes of high resistance and voltage drops
- Inspect fuses under the starter switch. If any are blown, inspect wiring connections for shorts to the chassis or other shorts. Replace the fuse and repeat the test.
- Inspect the Starter: If the connections and batteries are fine, a failing starter motor, stuck brushes, or dirty slip rings may prevent the generator from reaching the required cranking speed. Test for voltage at the starter. If the voltage at this point is adequate, replace the starter. If voltage at the starter is less than 10 volts, disconnect the starter and test the wires again.
On my starter, the voltage matched the battery voltage, indicating the wiring up to that point was fine, and the starter was the failure point.
Relays buried inside the generator may also fail, but like the starter, you have to disassemble the generator to reach them.
On my generator failure, I performed the three checks while still boondocking, and all were fine. What I didn’t do was inspect the starter.
Our repair
We were a few miles north of Salmon at a newly graveled RV park when we did our generator rebuild. It was hot, and we sat in the direct sun with both air conditioners running. I got help from a local mechanic to complete the rebuild, mostly because I was sure they’d have to remove the generator from the RV and do the repairs in their shop.
I have heard multiple horror stories about working on Onan generators and wanted a fallback in case of failure. For me, a fast repair mattered more than doing every part myself. My RV would have looked pretty stupid driving around Salmon with a gaping hole in the front, but you gotta do what you gotta do.
Disassembly while still in the RV
The following disassembly steps assume the generator is mounted at the front of the RV and has been pulled out. Unlike the fault codes and troubleshooting sections where I gathered the information, this section is all mine. You do not need to remove the generator to disassemble it. This doesn’t mean that disassembly will be easy.
Remove top cover. This will require removing the bolts attached to the back cover along the top edge. Removing the access cover on top of the engine gives you a place to hold it while removing the top cover. Removing the bolts along the back side of the generator requires crawling under and behind the generator. Once the back of the cover is free to move, slightly lift the top cover and slide it forward to clear the wire harnesses on the RV firewall while moving the front of the cover toward the driver’s side.
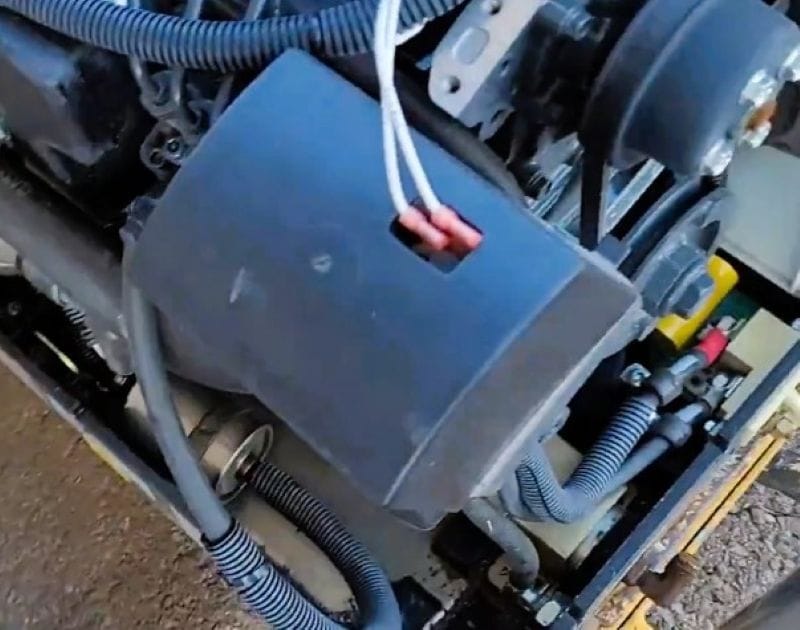
Inspect the governor box. As needed, zip-tie the governor box to keep it from rattling. Two wires are connected through the cover; if they come loose while the generator is running, they will shut off the fuel, and the generator may never start again. My governor box was already zip-tied and wasn’t rattling, so at least this wasn’t my problem.
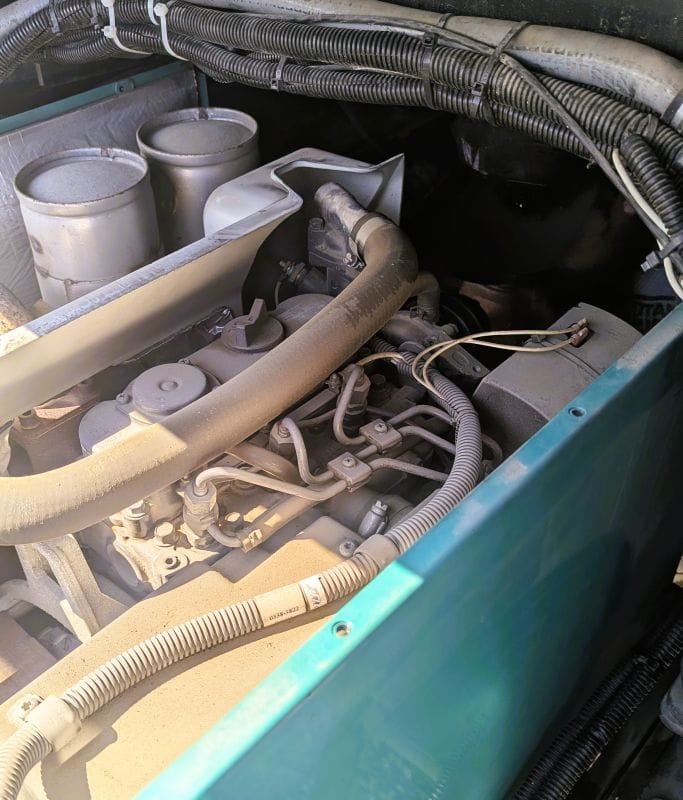
Inspect the upper radiator hose. With the top cover removed, you can access the upper radiator hose but not the lower radiator hose. Access the lower radiator hose from the passenger side of the generator.
Remove driver’s side cover. You can remove the driver’s-side cover before the back cover. Install the back cover forward of the overlap on the driver’s-side cover. Removing the driver’s-side cover before the back cover makes it easier to install or remove the back cover. Removing the driver’s-side cover may require loosening the front bolts to allow wiggle room. The difficult part in removing the side cover is that the bolts along the bottom edge will require an old-fashioned open-end wrench. Removing these bolts takes a long time.
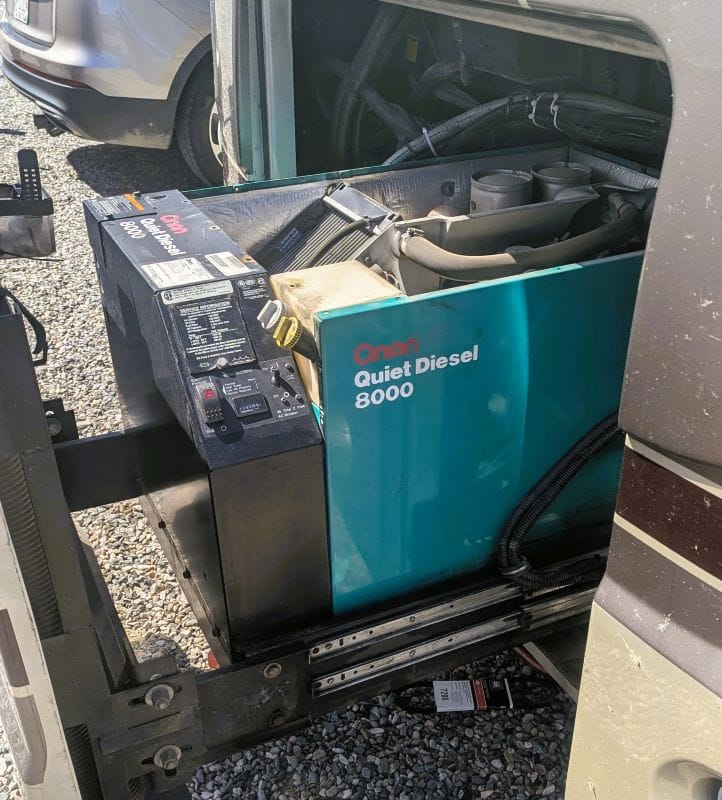
As needed, remove the back cover. You do not need to disconnect the DC electrical connections or fuel hoses before removing the back cover. You must remove the back cover to change the water pump belt or remove the passenger side cover.
Remove the back cover. After removing the top cover and all back cover bolts, lift the back cover slightly from the bottom, then pull it toward the passenger side and aft; then remove the driver’s side cover if you haven’t already. When sitting under the RV, behind the generator, the side to pull aft will be more obvious.
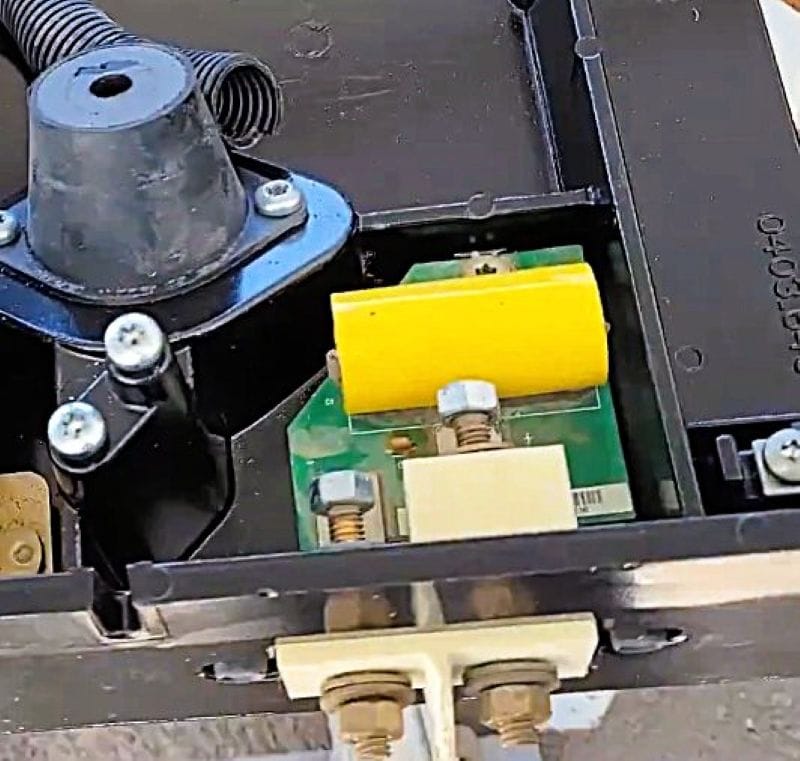
Warning: A capacitor is located just forward of the electrical connections inside the lower casing. Capacitors are always dangerous to work around, and if unintentionally shorted, they can discharge rapidly, causing a massive, blinding spark or melting.
Draining the coolant isn’t necessary before removing the water pump pulley, but is required if you’re also removing the water pump, radiator, or lower radiator hose.
To remove the water pump, remove the four bolts on the water pump pulley and belt. To change the belt, you must remove the water pump pulley from the shaft. You can remove the water pump only after removing the water pump pulley. Once removed, the water pump will hang temporarily from the water pump hose.
To remove the thermostat and temperature sensor, remove the top cover and either remove or cut the plastic shroud, or remove the water pump. To remove the plastic shroud, remove the passenger-side cover, exhaust assembly, radiator, and lower radiator hose.
Remove the passenger-side cover: First, remove the top and back cover.
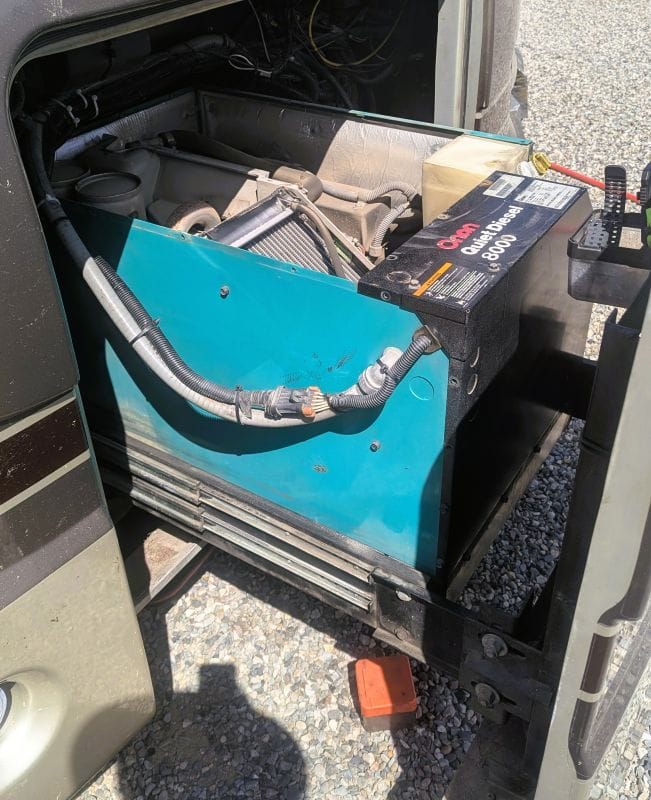
Remove the lower radiator hose: Before removing the lower radiator hose, drain the radiator fluid with the cap accessed from the bottom. Access to remove the lower radiator hose clamp is through the bottom.
Changing the oil pressure sensor requires removing the plastic air diverter (air shroud) on the passenger side of the generator; it is located on the aft part of the block.
Our generator rebuild
The most frequent repair on my generator seems to involve the coolant system. This was not my problem. A simple device like a thermostat repair at a shop can cost hundreds in labor, all for a twenty-dollar part. The generator was not designed to be simple to fix. Replacing the alternator will be similar labor to replacing the thermostat. The big difference is that a new alternator is very expensive. Our repair was expensive because I lacked knowledge and was in a remote part of Idaho. We paid dearly for both an official Onan (made by Denso, not Onan) starter and installing the starter. Once the new starter was installed, however, it has started every time.
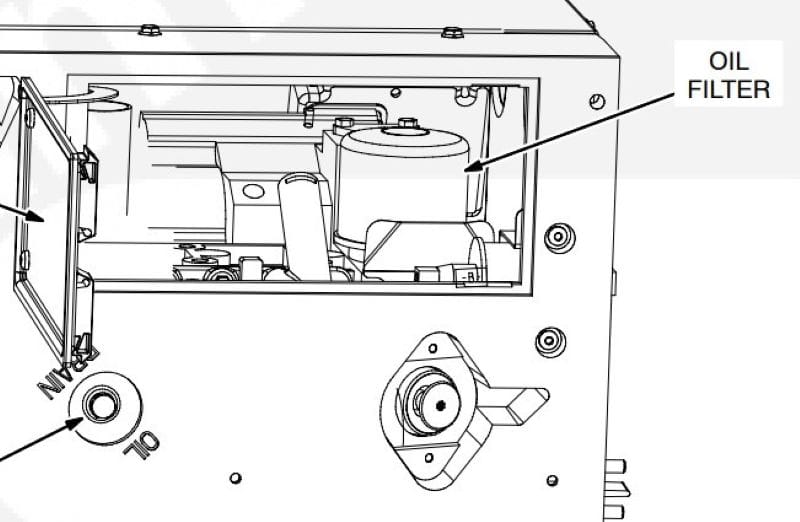
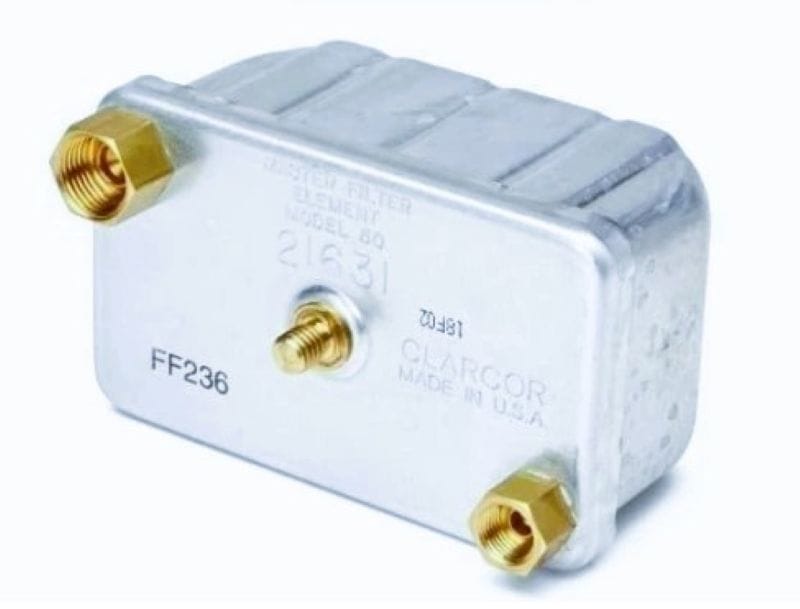
As part of our rebuild, we replaced the belt mentioned above, the starter (including the starter solenoid), performed a full annual maintenance oil change, and replaced the fuel filter. I didn’t replace the hoses because I didn’t want to open up the passenger side of the generator. The top hose (and the belt) looked brand new.
Then we found the leak
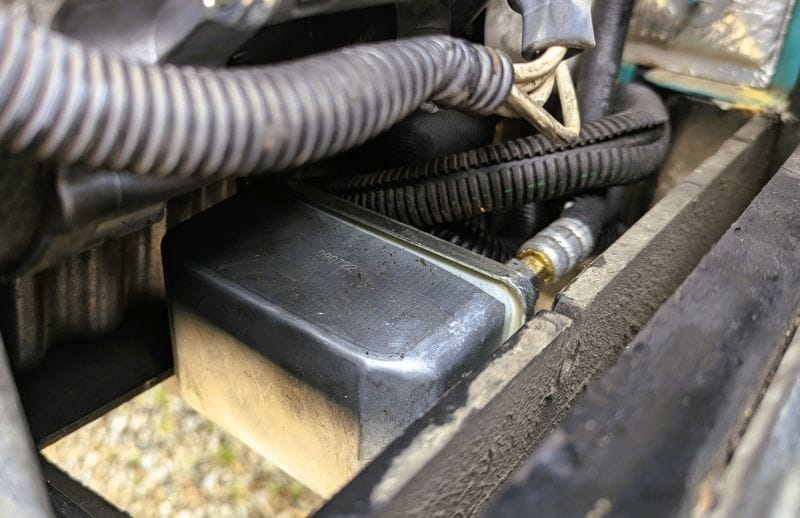
You can only tell a story in sequence; here, we found the leak by adding coolant to the reservoir during the service a week before replacing the starter. The coolant added to the reservoir leaked out the very next day, and we knew there was a new, different problem a week before we replaced the starter. Then, when replacing the starter, we found the crack where the fluid leaked from. Two weeks passed between when I wondered where the fluid went and when I finally fixed it.
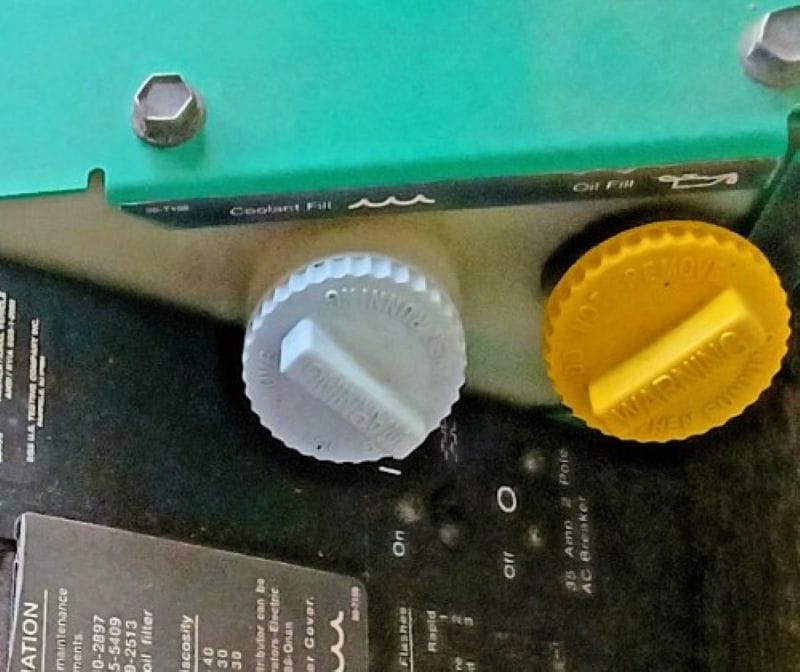
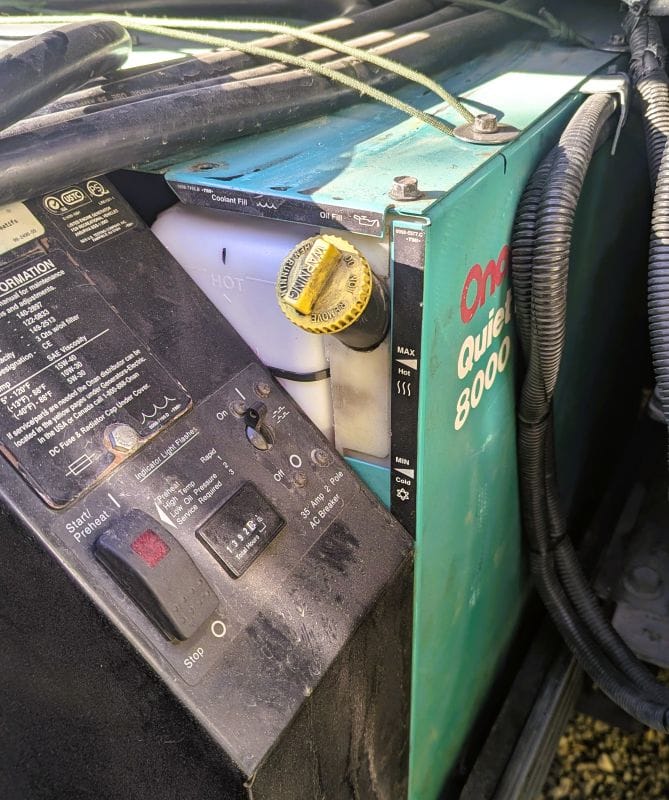
Sometime over the last year (perhaps longer), we had a crack in our coolant overflow reservoir. This meant that anytime hot coolant entered the reservoir instead of draining back into the engine block as it cooled, we lost coolant through the leak. This reservoir is also called a coolant recovery tank.
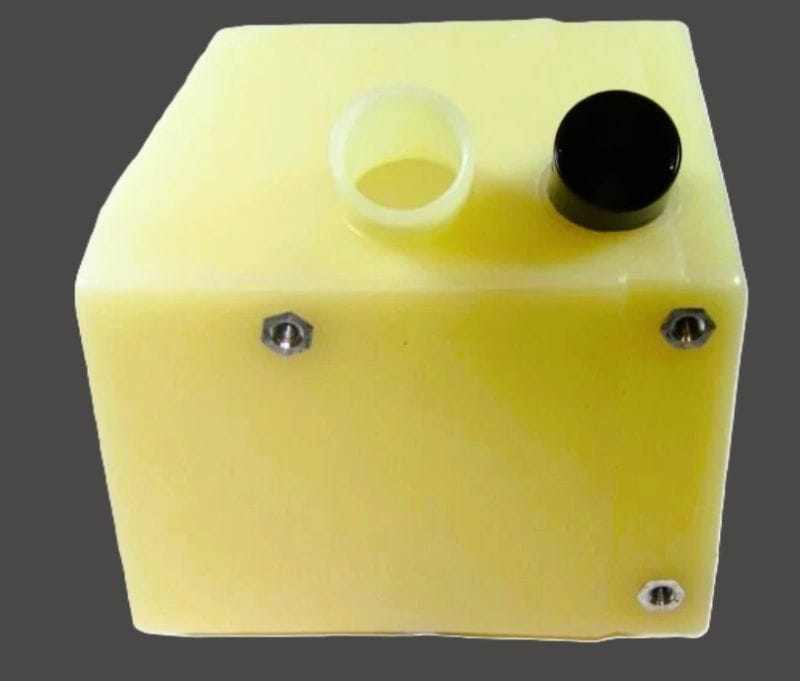
Until we disassembled our generator, I never knew about the leak because the crack was inside the tank and not visible without removing the top cover. The lost coolant was inside the generator, dripping out the bottom. The crack was well hidden because it wasn’t on the outside of the tank; it was inside. You couldn’t see the crack unless you looked inside the reservoir. Since the leak was inside the steel box and drained to the generator’s bottom pan, you couldn’t see it unless you noticed antifreeze where it shouldn’t be. Extra antifreeze on the bottom could be due to sloppy maintenance rather than a leak.
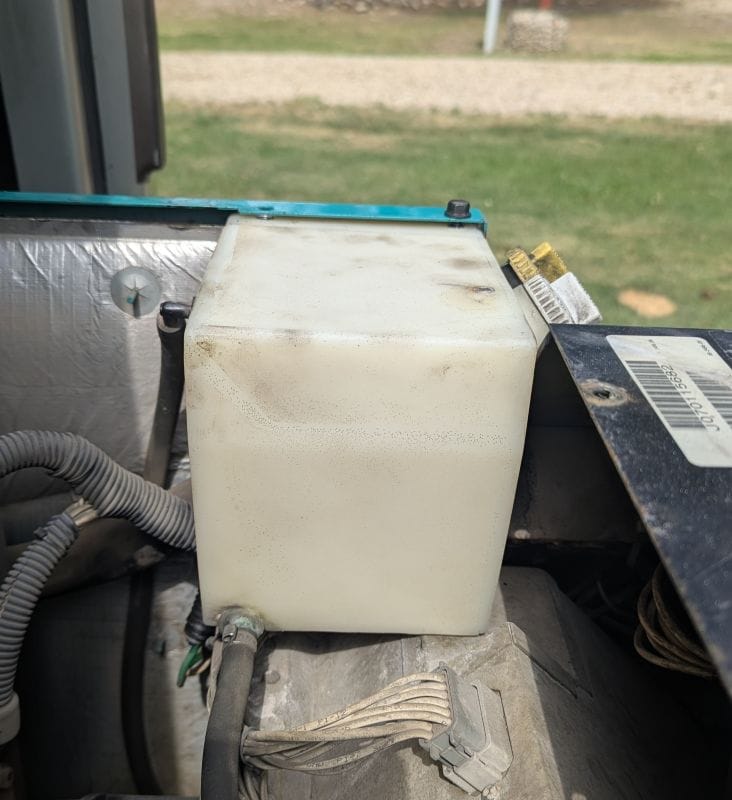
Onan designed the coolant reservoir with a pass-through for the oil dipstick. This design allows you to check or fill the oil from the top without a secondary access point. The crack was inside the tank right next to the oil dipstick. I was mortified that the leak may have contaminated the engine oil. If that happened, we would probably have, at best, a poorly running engine after an immediate oil change. It wasn’t until I removed the top cover for the third time in two weeks and disassembled the coolant reservoir that I understood that my engine oil wasn’t contaminated with antifreeze.
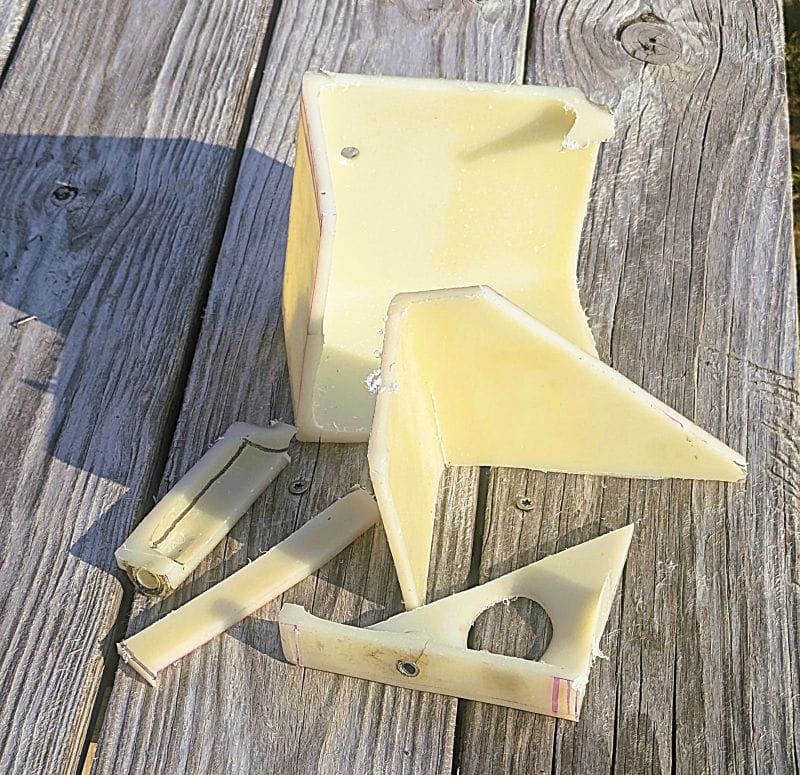
By the time I disassembled the coolant reservoir, we were miles north of Salmon in Lolo, Montana, and I wasn’t willing to buy a used tank from eBay for $250, and Onan had discontinued a new coolant reservoir. We had the same “item discontinued” problem when searching for a replacement starter. These things are either rare, or Onan uses rarity as an excuse to charge more. They know you need an expansion tank, and they also know their expansion tank has a high failure rate.
What Onan ignored is that any coolant expansion tank that fits in the location would work just fine. They didn’t know that I would do whatever it took to get my generator running. So I got a new generic expansion tank, then set to cutting the old tank into as many chunks as needed to get as much of it out of the way as possible, so I could replace the broken tank with a generic expansion tank.
Reflections on my generator overhaul
Do I know that the starter was really bad? Yes and no. The new starter fixed the problem. Was the starter solenoid the problem or the starter? I don’t know. Would I make the same repair without assistance? Absolutely, now that I know that you don’t have to remove the generator from the RV. Will I replace my generic expansion tank with a real Onan expansion tank with a dipstick hole down the middle? Don’t hold your breath; function beats beauty here.
While I am unhappy that I had to repair my generator, I have learned so much about what can fail and how to fix it; I value the education. Over-engineered. It took us a month to fix our generator and another month to write this for you.
Please subscribe and join us on our journey
We will add you to our email list and send you updates once a week. Here is a link. Subscribe
About our links
As you know, our blog income is zero – this allows us to be independent and just tell the truth. We don’t earn income or commissions. No, we don’t make paid endorsements. We don’t make recommendations; instead, we tell you what we like (or dislike). We provide links only as a quick reference to help our readers.
Links
Onan Service Manual for my generator
Onan Installation Manual for my generator
Onan Operator Manual for my generator
About Comments
We love seeing your comments, but they are not automatic. I get about 20 spam comments every day, so I don’t allow automatic comments. I read and personally publish every comment to protect the blog and keep it on topic and real. This means you won’t see your comment right after you hit submit. Sorry for the delay in publishing your comments. We love hearing from you.